So you like your coffee chilled this time of year (or, okay, any time of year): You can either go with iced, which is meh, or cold brew, which is not meh and is, in fact, amazing—especially when you make it yourself.
But why shouldn’t you just buy it? Fair question. And you can, but as a lot of us learned this spring, coffee shops aren’t always open when you need them to be.

History-making, business-shuttering pandemics aside, too often big coffee chains and bad baristas take shortcuts. They’ll use crummy beans, pull the brew too early, or (worse yet) chill hot coffee—which is actually iced coffee, not cold brew. Then they load it up with sugar to conceal the taste of coffee that’s burned or weak.
Well-made cold brew doesn’t need any of that. It tastes naturally sweet and malty— almost as robust as craft stout on nitro, and as smooth. Great cold brew coffee is in need of no concealers.
“A lot of customers look at me funny when I explain what it is,” says Ryan Park, co-owner of Flat White Coffee in Cypress, California. “They’re like, ‘What do you mean you brew the coffee with cold water?’”
That may give you the sense that making good cold brew is complicated, but it’s not. You just need a few tools, a little downtime, and a thirst for flavors that go beyond whatever caffeinated milkshake the doughnut shop is pushing this summer.
Step 1: Select Your Cold Brew Brewing System
You know how much energy you have for making coffee when you’re under-caffeinated. Base your brew system on that knowledge.
The Best Cold Brew Brewing Systems
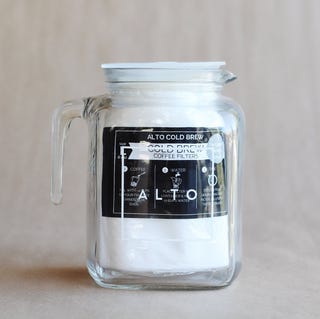
Here’s your pick if you just want cold brew without fuss. Fill one sock-shaped bag with grounds, stuff it into a mason jar or pitcher, and steep overnight. The bags hold a surprising amount of coffee, so you can brew big batches. Drawback: You have to restock the brew socks.
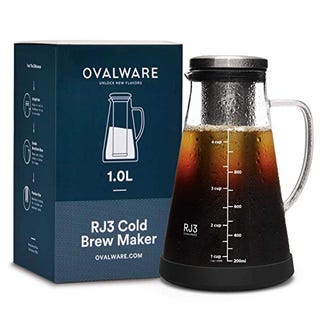
This system takes inspiration from Erlenmeyer flasks. Fill the insert with grounds, steep, and drink (well, eventually). While the stainless-steel sieve is a little challenging to clean, it’s also the simplest way to filter coffee without paper.
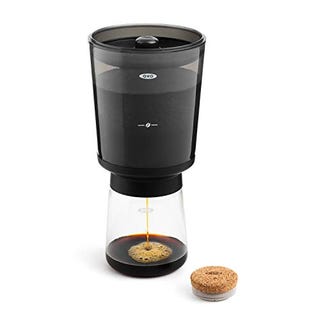
Pour coffee into the plastic cone until you hit the bean line, top with water, and wait. Then set the cone on the glass jar to release the brew. Each batch is small—24 ounces is the max—but the process is so easy you won’t mind.
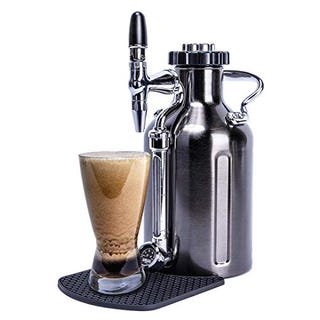
This is your rig for dedicated cold brewers. Nitrogen bubbles give Guinness its velvety texture, and as it turns out, you can apply the same treatment to cold brew. Make the coffee inside the growler-size uKeg, load a nitrogen cartridge, and spend the next few days pouring luscious cold brew.
Step 2: Buy Fantastic Whole Cold Brew Beans
You can make cold brew with any ol’ bag of beans and it’ll turn out delicious. But roasters have started selecting and roasting beans that work especially well with no-heat brewing. We tasted the latest crop to find the most flavorful.
The Best Cold Brew Whole Coffee Beans
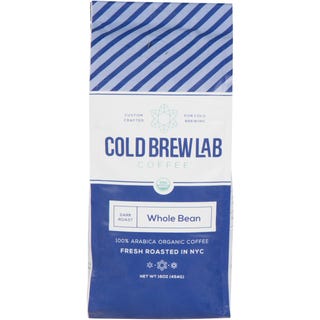
If you take your coffee black, drink this.
You’ll taste some bitter chocolate, a little black licorice, and a touch of almost-burnt bread. If those things are your things, get on this.
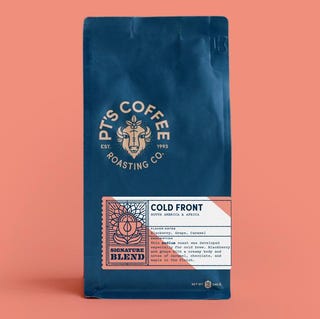
If you take your coffee with cream and sugar, drink this.
It’s a medium-roast bean, which means you’ll taste a more chocolaty sweetness, but also hints of blackberries and caramel.

If you’re more of a tea drinker, drink this.
This blend of four beans (from Sumatra, Guatemala, Ethiopia, and Mexico) delivers an easy-drinking brew with a strong hit of orange.
Or a green tea drinker, drink this.
It’s vegetal, dark, and spicy. It’s also polarizing for those very same reasons, but if you’re looking for something different, here it is.
Step 3: Brew!
Hot coffee is brewed one pot at a time. Cold brew is more like meal prep. Ryan Park of Flat White Coffee provides the method.
1. Start on Coarse
Pre-ground beans produce a weak brew. If you have a grinder, use the coarse setting on whole beans. Or have your local barista grind them. (Just tip them for doing so.)
2. Pour in the Water
After loading the coffee into your brew vessel, add room temp water. Park uses roughly half a gallon for a 12-ounce bag of beans or a quarter gallon for six ounces.
“Stir it for 20 or 30 seconds,” he says—just enough to saturate—“and then let it sit, covered.”
3. Go Do Something Else
For 18 to 20 hours. So if you begin at noon Sunday, you’ll have cold brew by 6:00 a.m. Monday. If the beans soak longer than 24 hours, the brew will taste nasty.
4. Dilute It
What you brewed was actually a concentrate. (Surprise!) “Dilute it with a one-to-one ratio of water,” says Park, in either your cup or a pitcher. It’ll taste best within the week.
Source: Read Full Article